Get a pre-made project plan based on this how-to guide on startuptoolkit.info
Where should we place the Sign Up button? Which slogan seems more catchy? These are indeed the tough questions to have. Learn how the A/B tests can transform your guesses into the proven answers.
Intro into A/B testing
A/B testing allows you to compare several options of a web-page to see which one performs better. Both page options should have the same URL. Displaying different options of the same web page to various people, you can track their behaviour and analyze the results: which one has higher conversion rate, avarage bill per client, amount of subscriptions, etc.
The idea behind A/B testing is straightforward: you don't have to argue with your team which page is better. Raw data from testing will clearly provide an answer.
But it's worth noticing that even though the idea of A/B testing is quite simple, it's very important to set the ground rules correctly, so that the results are accurate and comparable.
Check out how EA raised their sales by 43% with the help of A/B testing (Case Study)
As EA prepared to release the new version of SimCity, they launched a promotional offer to drive more game pre-orders. The offer was displayed as a banner at the top of the pre-order page – front-and-center for shoppers. But according to the team, the promotion was not driving as much growth in pre-orders as they had expected. The team decided to test some other options and see which design and banner layout will drive more revenue.The First Option was to remove a promotional offer from the page. Surprisingly, removing direct all-to-action drove 43.4% more purchases. Turned out people really just wanted to buy the game with no extra incentive necessary.Most people believe that direct promotions drive sales, but for EA this turned out to be totally false. Testing gave them the information needed to maximize the revenue in a non-obvious way.
Sign up for Optimizely
Now you understand what A/B testing is and why companies run A/B tests. It's time to introduce you to the tool you'll be using to perform these tests for your website.
This service is very easy to install and easy-to-use. You don't have to be a programmer to get started with Optimizely.
We use Optimizely at Casual.pm, and we are really happy with the results so far.
*Please note:
When we started working on this how-to guide, Optimizely offered Free plan. That's precisely the reason why we have chosen them for our guide.
As of December 2016, they do not offer free plans anymore. Moreover there are no free A/B testing platforms out there that provide good user experience and solid analytics. That said, you can test Optimizely for Free for 1 month. Also, we've listed a couple of alternatives to Optimizely so that you have something to choose from:
Once you create an account, you’ll have to enable this service on your website. To do that, an "Optimizely snippet"—one line of HTML code—must be added to the source code of your website.
Here is how it’s done:
Go to the Optimizely Home page. Click the Settings tab, then the Implementation sub-tab.
Copy the line of code above the Snippet Details, exactly as you see it. Don’t add http/https to the URL or make any other modifications.
Add snippet to your source code
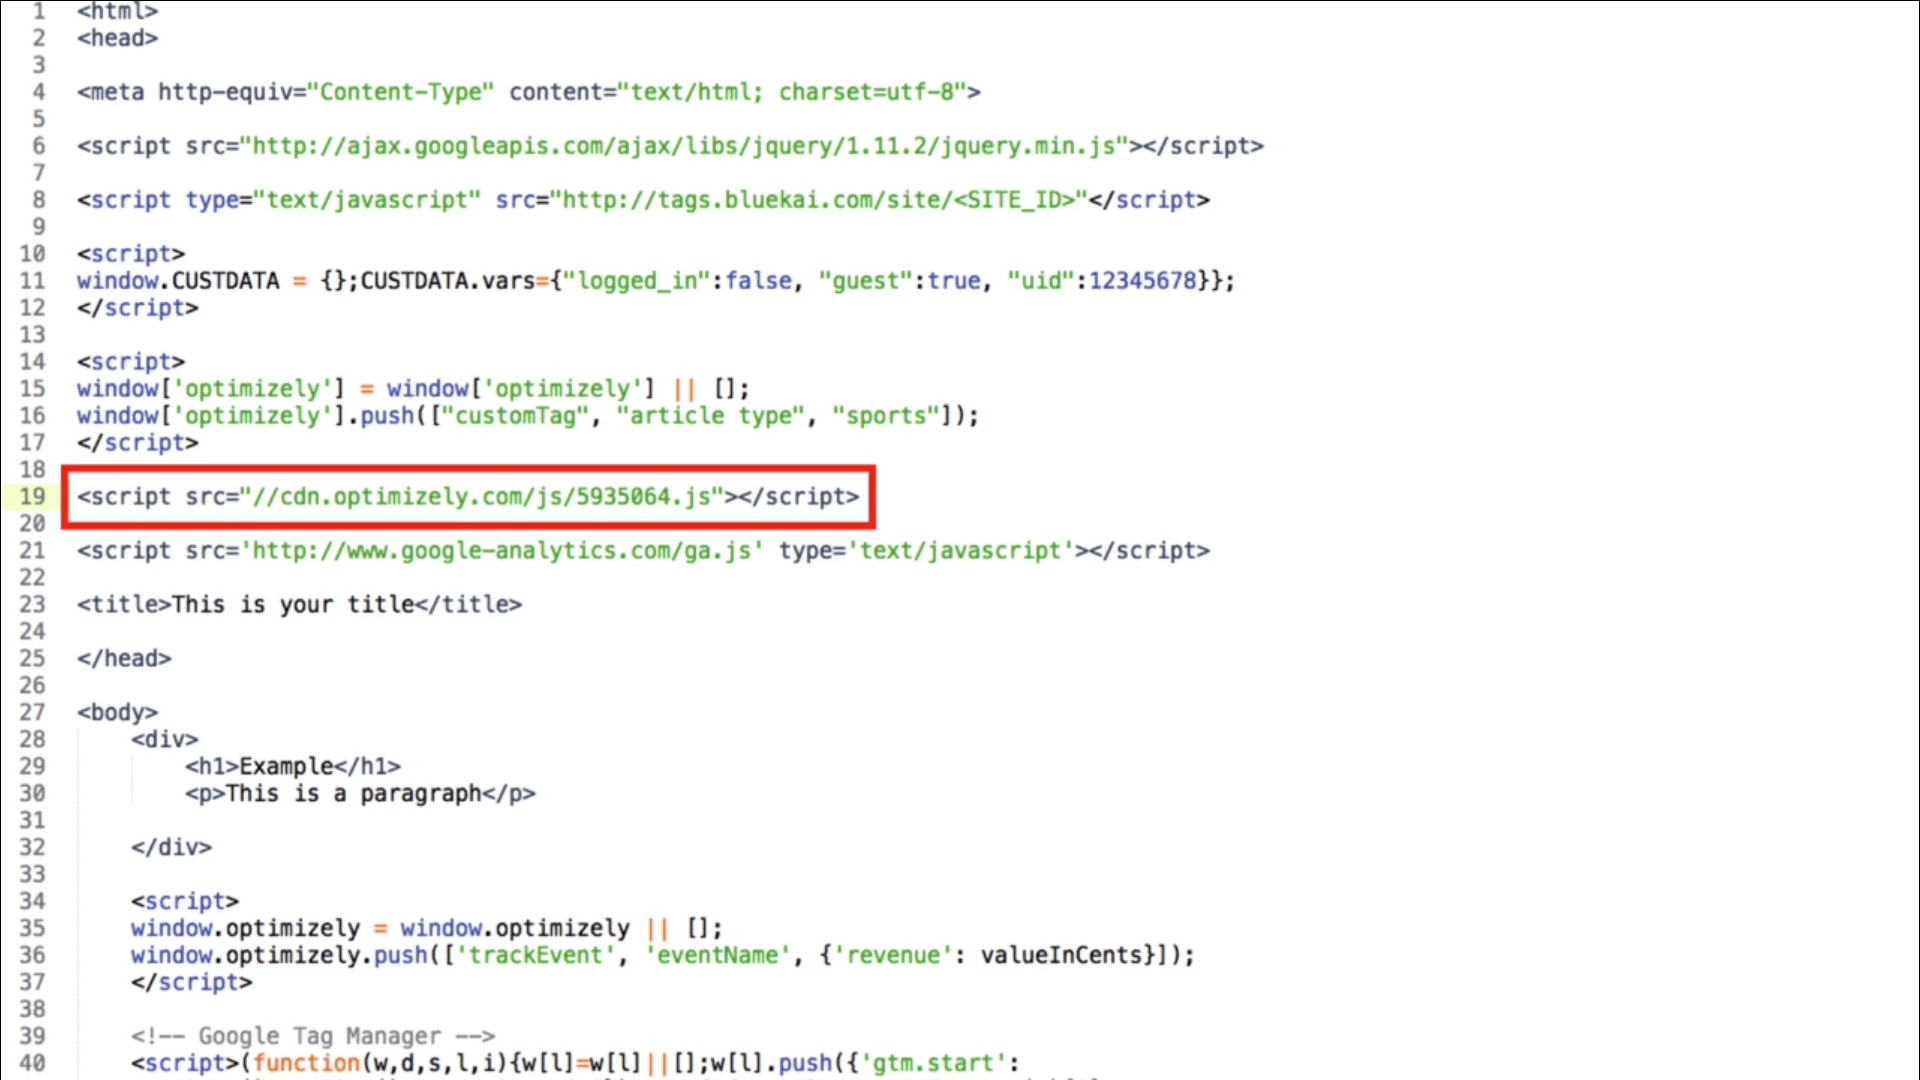
Optimizely website says:"The Optimizely snippet must be installed in the <head> tag of the HTML to ensure optimal performance. We recommend installing the Optimizely snippet as high up in the head tag as possible, generally after your <html> tag, charset declarations, and possibly other meta tags. Add the Optimizely snippet before the code for any analytics or heat mapping platforms as well.”We highly recommend you read the instructions on Optimizely website, as the tool is a bit technical.Here's what the Optimizely Snippet may look like on a page:If you want to add the snippet to a CMS-powered website (such as WordPress, etc.) please, check out the following webpage.
Setting up the experiments
Here, we will show you how to set up three tests that are essential for any startup:
Slogan
Sign up Form
Above the fold
Remember to plan your tests in advance. For a low-traffic website you might need days and weeks to properly test your variations.
Also, each experiment essentially consists of 3 main steps:
Create a variation
Set goals to evaluate the result: was the experiment successful or not
Run the tests and analyze the results
Test 1: "Slogan"
Your main tag line is essential in terms of website conversion. Thus, testing the main slogan or tagline should be on top of your agenda as it can lead to a substantial increase in sign ups for your services. In the end, your customers get a clear idea of what you do and how you can help them.
Create a variation
Navigate to the Home page and click "New Experiment" (this is where you will create a variation for your A/B test). Enter the URL of the website you’d like to test and name your experiment.Name your experiment:2. Using Visual editor create changes that you'd like to implement.3. In this variation we are going to substitute "Turn Your Projects into Awesome Visual Maps" with "Turn your boring task list into a visual project plan".
Set up URL targeting
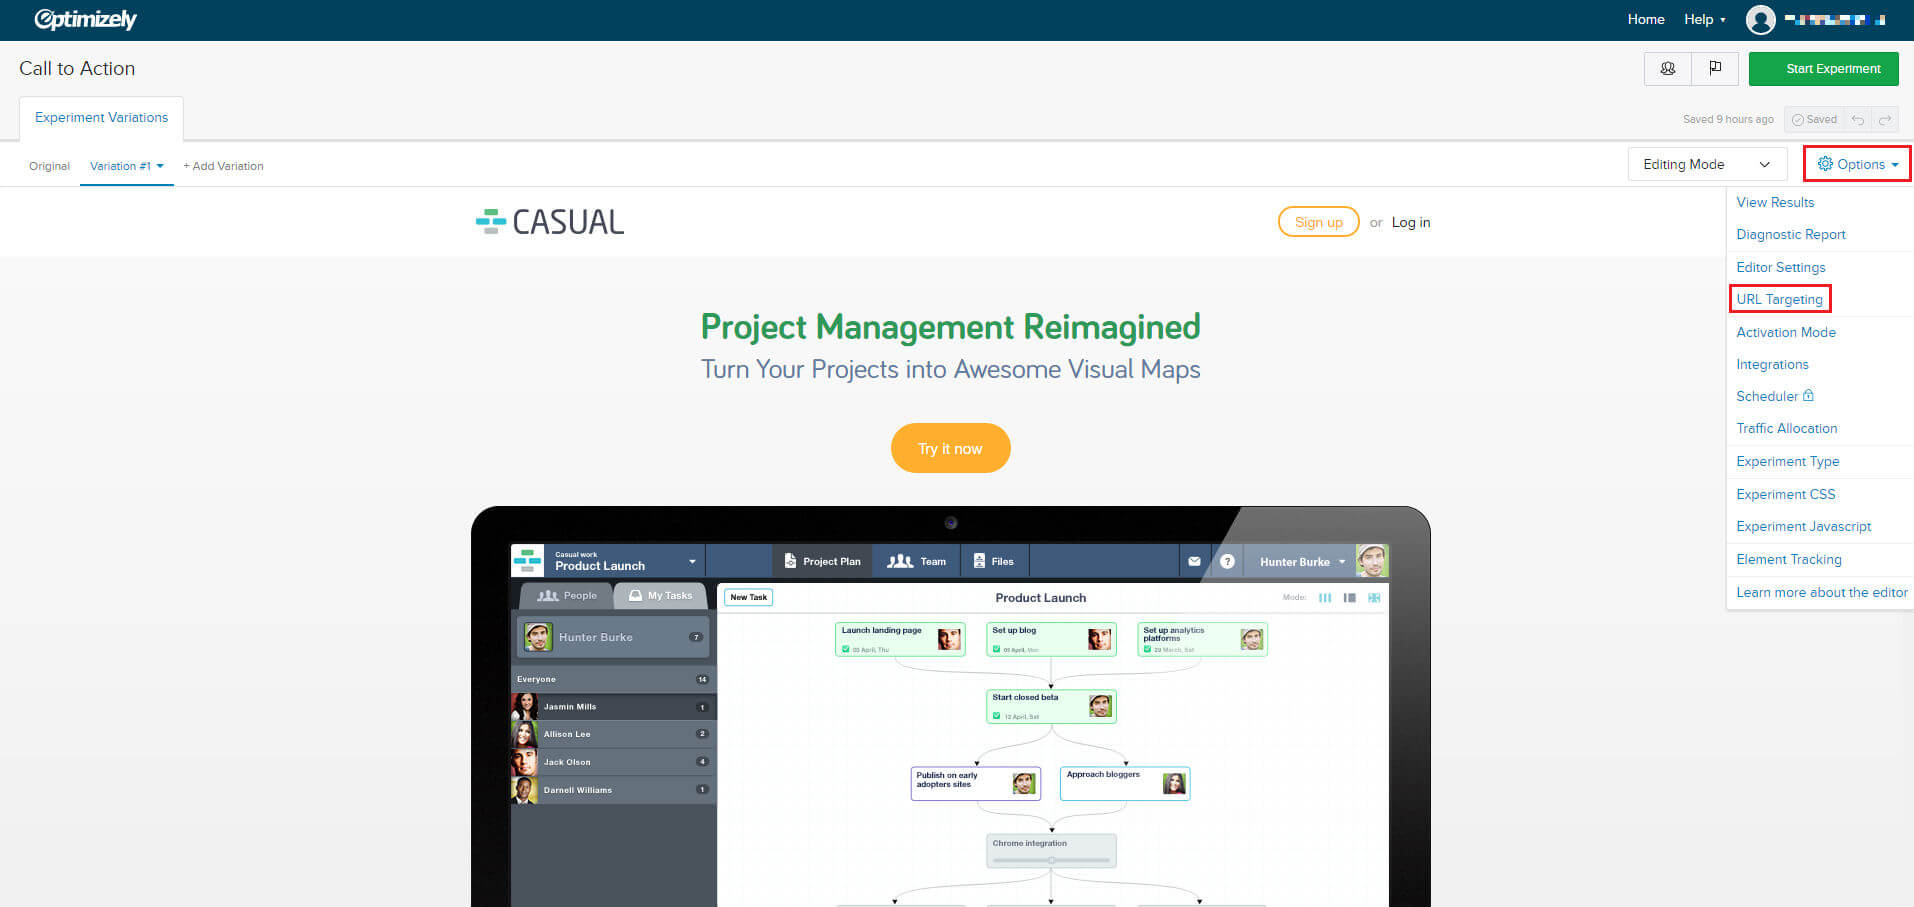
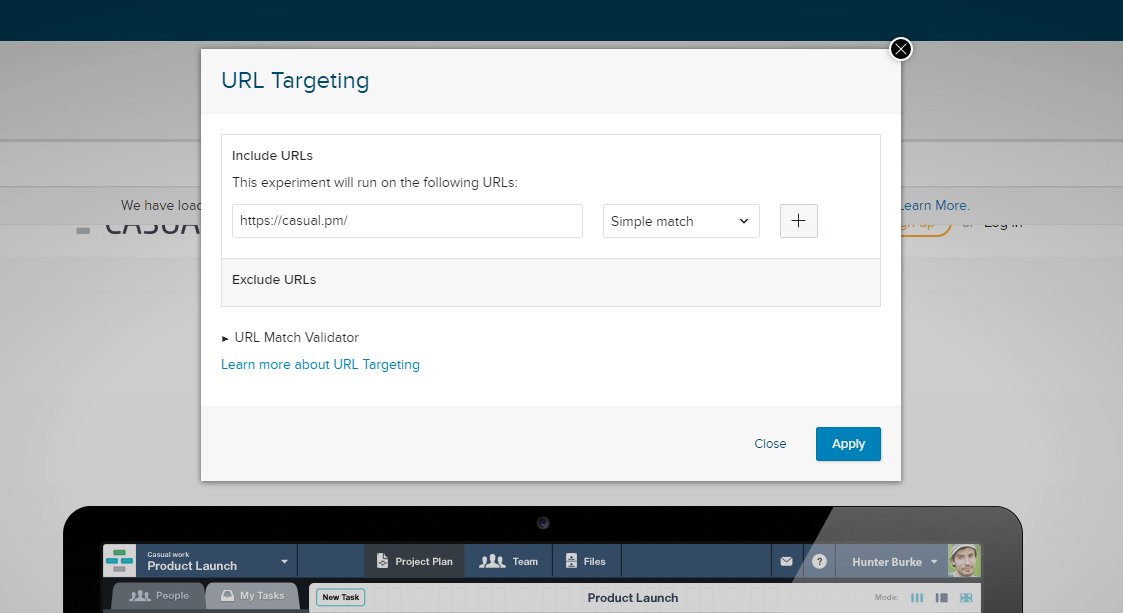
Go to Options and select "URL targeting". This is a place where you specify the address of a page that you are going to test. Usually, startups have just one landing page, but if you have a more complex website, then you can run multiple experiments on different pages at the same time.
Set audience and traffic allocation
Select the "Audience" button to identify user groups that will take part in the test campaign. Experiments are set to be displayed to everyone by default. However, you can narrow down your audience using a diverse set of parametres.
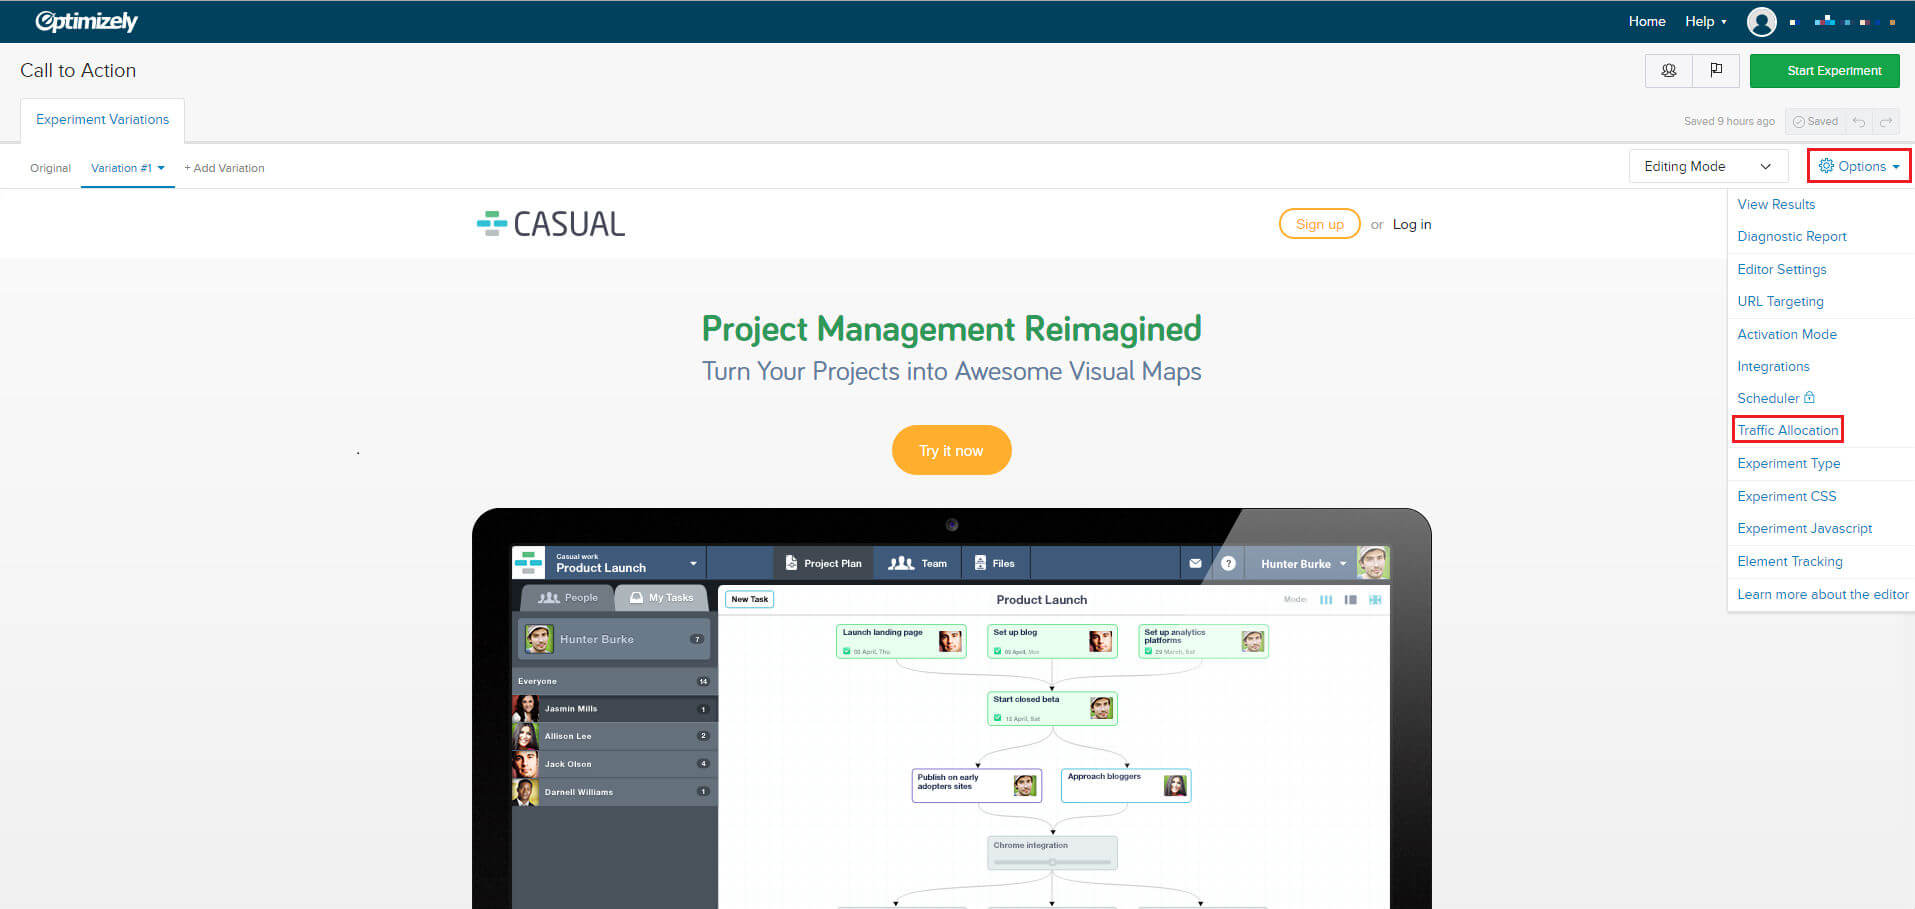
Press "Options", then select "Traffic allocation". Take a look at the screenshot below.
By default, all traffic is divided into two equal groups: 50% of users see the original version of the page, and other 50% see the modified version. High-traffic websites can set the limit for their traffic that participates in experiment.
Set Goals
Every experiment will lead to a conclusion that is based on gathered data. Setting the right goals is crucial to determine whether your experiment was successful or not. Click the "Set goals" icon:Then set goals. In our case we want to test our slogan, whether it gets the customer interested. So our main focus is Engagement and Sign ups:
Sign up button clicks
Engagement
Button click (to measure the general engagement on our Landing Page)
Q&A and publish
After setting up all components of your experiment, press "Save now" to secure your changes. Then click "Variation" on your Editor page and select "Preview". Besides, you should perform an in-depth QA review before pushing your experiment live to the world. Create a QA checklist that outlines all of the changes you’ve made. Your QA checklist should include:
All goals that were added, as well as how each is triggered
All functionality that’s been added (for example, a new button)
Common use cases including expected user flows to and from the page
Audiences that are eligible and ineligible for the test (e.g. certain location only)
URLs of the tested pages
Sample workflow to fire a goal (especially for custom events)
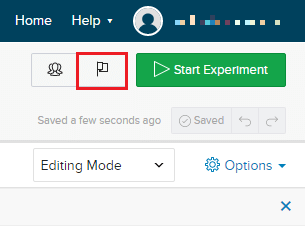
Once it's done, go to Visual Editor and click Start Experiment (Big Green button at the top right corner of the screen). Now the experiment is LIVE! Let the testing begin!
Run your experiment and analyze the results
After some time passed you can stop your experiment and analyze the results. Waiting time depends on the amount of traffic you have on your site: the lower the traffic means you'll have to wait longer until there is a conclusive result on your test.
Go to Home page and press "Results" to see whether your test proved the value of any improvements made to the original version of the site. Our test results show that Engagement has slightly increased, but signups stayed the same.That's not much of achievement. Let's declare this experiment failed. However, it is important that we conducted an experiment and now operate with numbers instead of guesses.
Implement changes (if needed)
Noticing a considerable difference in one of your goals on the page you've tested allows you to add tested changes permanently.
Test 2: "Sign up Form"
Our second experiment will focus on sign up forms.
Signup forms are crucial in terms of visitor conversion into the potential client. Confusing forms will make you lose your customers. On the other hand, well designed forms may increase conversions and then sales.
Create a variation
To get started with this experiment, load your landing page into the editor.
Click one of the input fields and select Edit Element, then Edit Style. The "Edit Style" feature lets you easily make changes to the background color, border size, text fonts etc.
The Dimensions tab allows you to change the height and width of the input field. Once you have finished adjusting the sizes and input fields colors, click the text titles and repeat the process.
Click Options, then URL Targeting to set up the URL targeting conditions for this experiment. Since your experiment should only run on one page, simply paste your landing page URL.
Please note that we omit some steps (like Set Audience or Traffic Allocation), because they are basically the same in all experiments.
Examples:Form 1Form 2
Set Goals
Now, how will you determine whether the larger input fields and new order process had an effect on sign-ups? Set a click goal on the “Sign up” CTA, so you can track which version generated a higher "click-through" rate.
If you would like to collect more granular data, you can set up custom events that track when visitors begin typing in a specific input field. Custom events such as this one will allow you to evaluate whether a certain field is generating drop-off.
Run experiment
Analyze the results and implement changes if needed.
Test 3: "Above the fold"
"Above the fold" is the term used to describe the first screen a user will see when coming to your website.The above-the-fold landing area is one of the most important parts of your website. It's what people see first when they "land" on your site.
It's important to put there clean and clear messages that won't distract potential customer from the following:
Understand what are you trying to sell.
What does the product do.
How it helps and delivers value to the customer.
How you can buy the service.
Create a variation
This is a good example:
Version 1:Version 2:Second version generated 47% more sign ups! Why?
Sign up page is clear, it doesn't confuse or distract, there is no images.
The headline is straightforward and communicates the value better.
Also, try experimenting with social sign up forms. Signing up with just one click is convenient. For sure it won't irritate your potential customer.
Set goals and run the experiment
In our business, the key metric is a conversion rate from free trial users to paying customers.
If the experiment results in more sign ups on a landing page, then accept the new version of the "Above the fold" design.
Yet, if the amount of paying customers didn't go up, this would mean that there are problems with an onboarding procedure and you should focus your attention on customer experience after they sign up to your website.
Good luck!
All in all, we've just scratched the surface on topic of A/B testing. Everything can be tested: from colors and copy to blocks availability and positioning. Remember: implement changes only if your test shows a significant improvement.
In conclusion, we gathered a few articles that provide additional knowledge on A/B test: